Back to September 2016 Newsletter
How to Dry Your Seeds to Perfection
Bob Wildfong
First of all, let's review what it means for a seed to be "dry". When you harvest seeds from your garden they should be fully ripe. For podded or headed plants such as beans, onions, and most flowers, that means the pods and seed heads should be fully brown and dried on the plants. The seeds might feel dry at this point, but they still contain a lot of moisture from rain and dew. For seeds from fleshy fruit, such as tomatoes or melons, they are obviously not dry at harvest. In all cases, seeds have to be spread out and dried in open air before they can be safely stored.
Many seed savers have discovered this the hard way. Bean seeds, freshly harvested, seem dry to the touch but if you put them in a sealed jar or plastic bag they soon turn mouldy because they aren't really dry inside. Flower seed heads may seem dry when you take them from your plants on a sunny day, but if you put them straight into a plastic bag you'll find them glued together with mould a few weeks later.
The best way to dry seeds is to spread them out so the air can get at each one, and let them naturally dry in the open. Plates, wide bowls, pie plates, baking sheets, or serving trays are all good, as long as the seeds are spread thinly so they dry quickly. I have sometimes tried to conserve space by piling the seeds too high: four or five layers deep. That's usually a bad idea because the bottom seeds can't contact any air so they can't dry quickly - so they either mould or sprout before they dry!
An even better way to get air contact on your seeds is to dry them on a screen. Then they dry from the bottom as well as the top, so you can spread them a little thicker. As long as the mesh is small enough to hold the seeds, you can use a wide variety of sieves and strainers, frying baskets, and salad spinners. Window screens work well too, and it is fairly easy to staple screen on a frame, or you might be able to find screens from old windows.
If you are drying wet seeds, for instance from tomatoes, you should aim for them to be fully dry within three days. Longer than that, and you risk them sprouting in your drying tray. This is, obviously, disastrous for the seeds because you can't make the roots go back in. Once they've sprouted, they will not germinate a second time.
No matter what method you use, here are two tips that make the drying process foolproof:
- Stir the seeds while they dry. This helps uncover any seeds that have less air contact, and even out the drying. Also, this is the best time to break up clumps of seeds that will inconveniently stick together later. If you've ever saved a large amount of tomato seeds, you've noticed how they clump together. Stir them when they're half-dry, and you'll have no clumps later.
- If seeds don't dry quickly enough, or if the air is too wet during a rainy week, just run an electric fan somewhere in the room. Even a small amount of air movement can make a huge difference.
Heat is not necessary, and easily dangerous. Some seed savers have tried speeding up the drying process using food dehydrators, or ovens set on a "low" temperature. Unfortunately, seeds tend to die when they're heated even a little, and there is no "low" setting on an oven that doesn't cook them. Ventilation and air movement is far more effective, and safer, than any form of heat.
Some people like to dry seeds on waxed paper or parchment paper, because the seeds are easily removed. Others like to dry seeds on paper towels because they draw moisture away from the seeds. Personally, I don't like the way that seeds stick to paper towels, but at a seed saving workshop last week a gentleman told me that it was the best method for him. I don't argue with other peoples' successes.
Above all, be careful that your seeds don't get mixed. I used to dry tomato seeds on plates, but I've switched to cake pans because the sides prevent the seeds from spilling out and getting mixed up.
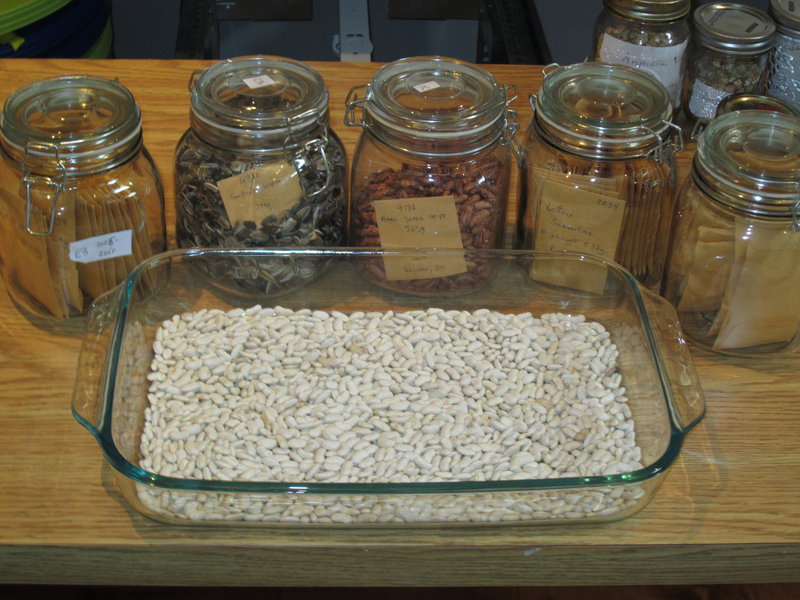
Ultimately, count on our dry Canadian winter air to bring your seeds to the right dryness. By November, the air in your home will be naturally dry enough to make your seeds safe for packaging in air-tight jars or plastic bags. Keep them in paper bags or envelopes until then, and seal them up dry for future storage. At Seeds of Diversity, we keep seeds in jars at room temperature, and they last for many years if the jars are sealed when the seeds are fully dry. We also keep seeds in a freezer for really long term storage, but that requires better drying with silica gel - a topic for another article.
Happy seed saving!
--
Bob Wildfong is Seeds of Diversity's executive director.
Not yet a member?
An annual membership to Seeds of Diversity gives you access to our seed exchange, seed grow-out programs, and our online news.

We depend on donations to do our work.

Thank you for your support!